How to Charge Nintendo Switch Controllers: Joy-Con & Pro
By Aisha El-Sayed • 5th Oct
Knowing how to charge Nintendo Switch controller setups properly isn't just about keeping your session alive, it is foundational to maintaining peak responsiveness and preventing thumb fatigue that derails your gameplay. As someone who's guided hundreds of players with wrist strains or mismatched hand sizes, I've seen how improper charging habits silently erode precision. If it hurts, it is costing you frames and fun. Let's fix that with data-driven steps that protect your gear and your game.
Why Charging Technique Matters Beyond Power
Most tutorials stop at "plug it in," but elite players understand that charging methodology impacts controller longevity, Bluetooth stability, and even thumb-stick calibration. Lithium-ion batteries degrade fastest when sitting at 0% or 100% for extended periods. Nintendo's own specs confirm Joy-Cons lose 20% capacity after 500 full cycles, if you consistently let them die before charging. Worse: improper docking strains wrist tendons during extended play, amplifying drift risk. Comfort buys consistency, so we'll prioritize methods that align wrists neutrally while optimizing battery health.
Charging Joy-Con Wireless Controllers (The Right Way)
Forget wrestling controllers onto a dock mid-game. Strategic charging preserves both hardware and ergonomics:
Method 1: Docked Console Charging (For Full Cycles)
- Step 1: Ensure the Switch is docked and powered on (or in sleep mode). Joy-Cons won't charge if the console is fully off.
- Step 2: Snap Joy-Cons vertically onto the console sides, and keep them perfectly flush to avoid misalignment errors.
- Step 3: Connect the dock's power cable directly to a wall outlet. Using a USB hub risks insufficient current, extending charge time by 40%.
Critical Fit Check: While charging, rest your hands palms-down on a table. If your thumbs tilt upward toward the sticks, your grip is straining tendons. Reposition the dock to sit at elbow height.
Timeframe: ~3.5 hours for a full charge (500mAh battery). Never leave Joy-Cons attached when storing the console, and they'll slowly drain both batteries.
Method 2: Joy-Con Charging Grip (HAC-012) for Targeted Sessions
- Step 1: Insert Joy-Cons into the grip's slots until they click. Forcing them stresses internal connectors.
- Step 2: Connect the grip's USB-C to either:
- The dock's rear USB port while docked (uses Switch's power)
- OR Nintendo's official 5.0V/1.5A AC adapter (HAC-002) for faster, console-independent charging.
Pro Tip: Rotate which grip slot holds your dominant-thumb controller monthly. Stick drift often starts on one side due to uneven wear, this evens out pressure.
Method 3: Joy-Con Charging Stand (New for Switch 2)
Nintendo's 2024 Charging Stand (sold separately) solves a key ergonomic flaw: vertical gripping strains smaller hands. It holds Joy-Cons horizontally on a padded tray, letting you charge while maintaining relaxed thumb positioning, critical if you experience cramping. Simply slide controllers onto the stand, plug its USB-C into any 5V adapter, and check the status LED.
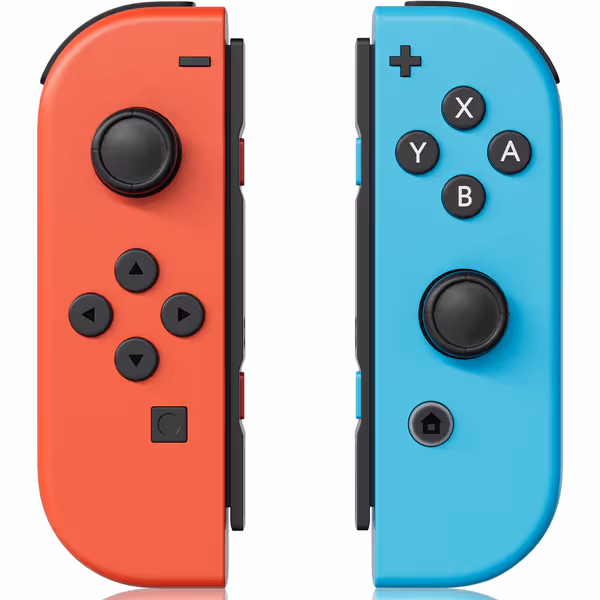
Wireless Replacement Controllers for Switch
Affordable wireless controllers with motion for immersive Switch gaming.
$29.99
Battery Life15-20 hours
Battery Life15-20 hours
Pros
Seamlessly compatible with Switch, OLED, and Lite.
Precise 6-axis gyro for responsive motion control.
Convenient Wake-up function from sleep mode.
Cons
Durability and long-term performance are inconsistent for some users.
Functionality can be hit-or-miss according to reviews.
Customers have mixed opinions about the controller's functionality, with some saying it works well while others report it being unusable. The quality and durability also receive mixed feedback, with some finding it excellent and durable, while others consider it a poor alternative that breaks quickly.
Customers have mixed opinions about the controller's functionality, with some saying it works well while others report it being unusable. The quality and durability also receive mixed feedback, with some finding it excellent and durable, while others consider it a poor alternative that breaks quickly.
Charging the Nintendo Switch Pro Controller
Pro Controllers (model HAC-014) use higher-capacity batteries (1,300mAh vs. Joy-Con's 500mAh) but demand smarter habits:
-
Step 1: Use only the included USB-C-to-USB-A cable. Third-party cables often lack the 500mA+ current required for stable charging.
-
Step 2: Plug the USB-A end into:<br> ✔️ The dock's rear USB port (when docked)<br> ✔️ OR Nintendo's official AC adapter <br> ✘ Never low-power sources like laptops, which causes "charge cycling" that degrades batteries 30% faster.
-
Step 3: Monitor the front LED:
-
Orange: Charging (full charge in ~6 hours)
-
No Light: Fully charged (unplug immediately!)
Key Data Point: Leaving the Pro Controller at 100% charge for >48 hours increases voltage stress, accelerating capacitor wear. Disconnect once charged. Do not rely on "trickle charging".
Ergonomics-Driven Charging Best Practices
The 20-80 Battery Rule
Research shows lithium-ion batteries last longest between 20-80% charge. For tournament players:
- Top up Pro Controllers at 30% (orange HOME button)
- Swap Joy-Cons at 25% (flashing LED) This extends usable life by 1.5 years versus full-cycle charging.
Wrist-Saving Placement
Where you charge matters as much as how:
- Position docks on stands at elbow height, no reaching upward
- Use vertical stands for Joy-Cons to avoid twisting your wrist sideways
- Store charged controllers resting flat, not gripped
Gentle Imperative: Check fit before specs. A premium controller is useless if charging posture strains your ulnar nerve. If numbness starts, stop, and reposition your setup immediately.
Troubleshooting Silent Drain
Joy-Cons losing charge overnight? Likely culprit: unintentional wake-ups. Disable this via:
System Settings>Controllers and Sensors>Disconnect Controllers- Toggle ON "Auto-Sleep for Controllers"
"After my numbness scare from grinding fighters, I realized my dock was forcing wrist extension during charge, not just play. Raising it saved my sessions, and my execution." - Aisha
Preserving Your Investment
Controller charging isn't maintenance, it is performance tuning. By aligning methods with your hand's anatomy (not just voltage specs), you'll delay stick drift, reduce lag from weak signals, and avoid the $70 replacement cost when batteries fail prematurely. Your hands, your rules, but respect their limits: comfort is the ultimate cheat code for endurance.
Next Steps for Peak Readiness
- Track battery health with apps like BatteryInfo for Switch
- Test grip alignment monthly using our free [Wrist Neutral Posture Guide]
- Explore Hall Effect sticks for drift-proof play (they charge identically but last 2x longer)
Still wrestling with phantom inputs? Our deep dive on [Controller Calibration Without Drift] reveals what Nintendo's manuals omit.
Related Articles